 Save
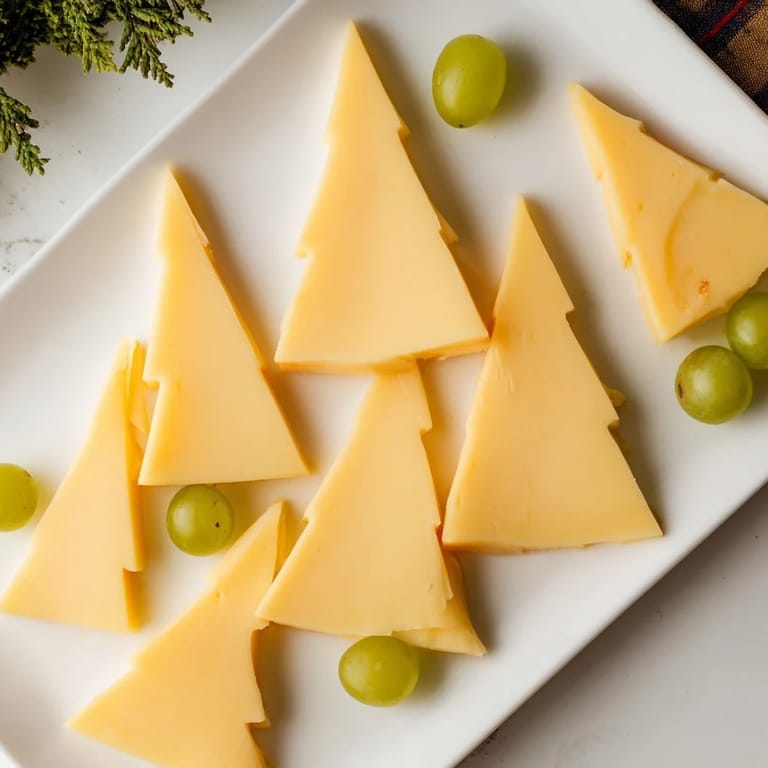
Save I discovered the magic of the Tannenbaum Border while hosting a small holiday gathering last December. My kitchen felt chaotic that afternoon—too many dishes, not enough time—when I realized I needed something beautiful but effortless for the cheese board. That's when it clicked: why not turn the border itself into the showpiece? I grabbed a block of cold Gouda, a sharp knife, and those perfect little green grapes from my crisper drawer. Within minutes, my platter transformed into something that looked like a miniature forest of stylized pine trees. My guests arrived and actually gasped when they saw it. That's when I knew this simple technique would become a holiday tradition.
I remember standing back from the completed board that December evening, watching people lean in to admire it before they even realized they could eat it. My sister actually pulled out her phone to photograph it before touching a single triangle. That moment—when something homemade stops people mid-conversation—reminded me that food presentation isn't about being fancy; it's about showing people they matter enough to receive something thoughtful and beautiful.
Ingredients
- Semi-firm cheese (Gouda, Edam, or Emmental), 250 g, well chilled: The cold cheese is absolutely essential here—it slices cleanly into those crisp triangles without crumbling. I learned this the hard way with room-temperature cheese that turned into frustrating shards. Gouda gives you that slightly sweet, creamy undertone that feels festive without being overwhelming.
- Small green seedless grapes, 150 g, washed and thoroughly dried: The drying part matters more than you'd think. Wet grapes slip between the cheese triangles and roll away; dry ones nestle perfectly into the gaps. These little spheres provide the perfect visual punctuation between each cheese tree, and their bright color makes the whole arrangement pop against the board.
Tired of Takeout? 🥡
Get 10 meals you can make faster than delivery arrives. Seriously.
One email. No spam. Unsubscribe anytime.
Instructions
- Chill your cheese and sharpen your knife:
- Pull your cheese from the coldest part of your fridge at least 30 minutes before slicing. A truly sharp knife makes the difference between clean, elegant triangles and messy, jagged edges. I test mine on a tomato—if it glides through without pressure, it's ready.
- Slice with intention and confidence:
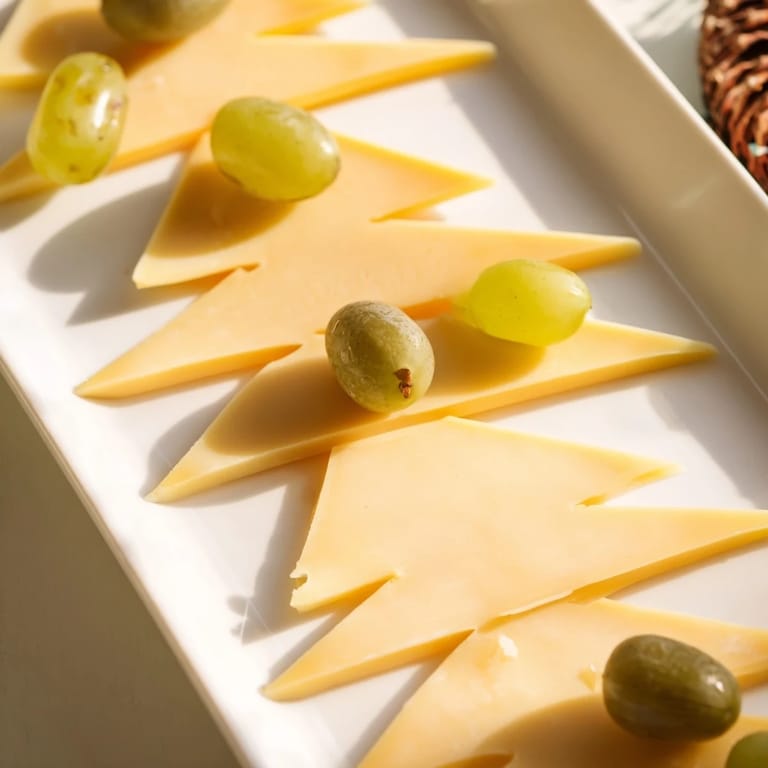
- Cut thin triangles about 5–6 cm long, with roughly a 1 cm base. Think of stacked pine trees—each slice should be elegant but substantial enough to hold together. If your first few feel wobbly, you're not alone; by the third or fourth slice, your hand finds the rhythm.
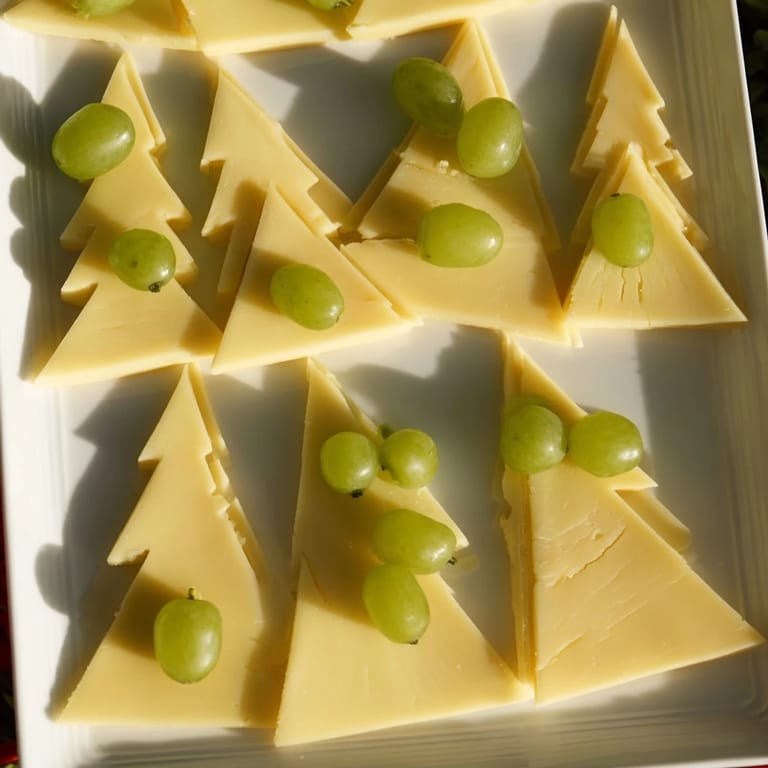
- Build your border with the points facing out:
- Arrange the triangles around all four edges of your board with the sharp points facing outward, like a ring of stylized evergreens. This is where the real magic happens—suddenly it stops looking like random cheese and starts looking intentional and festive.
- Tuck grapes into every gap:
- Nestle the dried grapes between and around the cheese triangles. Don't be shy about filling those spaces; the grapes add both visual interest and flavor pockets that make each bite feel complete.
- Fill the center with your favorite companions:
- The border is now your frame. Fill the inside with cheeses you love, cured meats, crackers, nuts, or honeycomb—whatever feels right for your table and your guests.
 Save
Save What started as a practical solution to a last-minute presentation problem became something deeper that evening. As people nibbled and chatted around that board, I realized the Tannenbaum Border had created a kind of edible centerpiece—something that brought people together not because it was complicated, but because it was thoughtful and beautiful in its simplicity.
Variations That Feel Natural
Once you've made this once, you'll start seeing endless possibilities. I've experimented with thin slices of Emmental for a slightly nuttier flavor, and the pale golden color creates a lovely contrast with the grapes. One year I added a few pomegranate seeds alongside the grapes for pops of deep crimson—my mother-in-law said it looked like a winter landscape painting. Red grapes work too if you want to shift the mood toward more traditional holiday colors, though I find green feels fresher and more unexpected.
The Cheese Board as Canvas
This border technique teaches you something important about presentation: constraints create creativity. By committing to the border as your focal point, you're freed from worrying about an elaborate center arrangement. Fill it with whatever you love, arrange it however feels right. The border carries the visual weight, so you can be casual about what goes in the middle. It's oddly liberating.
Making It Your Own
The beauty of this recipe is how honestly personal it becomes. That December gathering led me to think about the holidays differently—less about elaborate preparations and more about creating moments that feel intentional. Now I make this border for almost every winter celebration, and each time someone discovers it, I remember why I love cooking for people.
- Try adding fresh rosemary sprigs nestled between the cheese triangles for an extra pine-tree effect that also smells incredible.
- Use this technique on platters of different shapes and sizes—it works beautifully on round boards, rectangular platters, and even the edges of large platters of mixed appetizers.
- Prepare everything the morning of your gathering and assemble just before guests arrive so the cheese stays cold and the grapes stay dry and perfect.
 Save
Save The Tannenbaum Border reminds me that the most memorable food moments often come from simplicity, not complexity. It's a small gesture that says a lot.
Recipe Help & FAQs
- → What type of cheese works best for the pine tree shapes?
Semi-firm cheeses like Gouda, Edam, or Emmental are ideal because they slice cleanly into thin triangles that hold their shape well.
- → Can I substitute grapes with other fruits?
Absolutely! Small red grapes or pomegranate seeds also complement the design and add color variation.
- → How thin should the cheese slices be?
Slice cheese about 5–6 cm long and 1 cm wide at the base, thin enough to resemble tree shapes while holding their form.
- → Is this presentation suitable for dietary restrictions?
Yes, it works well for vegetarian and gluten-free diets, but check cheese labels for additives if allergies are a concern.
- → What tools are recommended for assembling the border?
A sharp chef's knife and a sturdy serving platter or wooden board will make slicing and arranging easier and more precise.